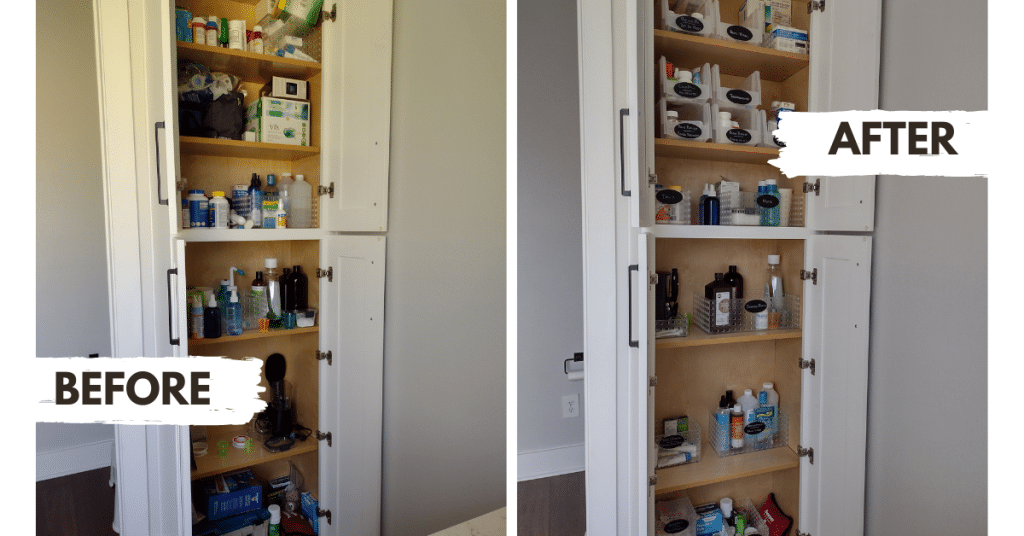
I love to organize! So, this past weekend I figured I would tackle the main cabinet in our master bathroom. Our sink cabinets have storage under the sink along with drawers but the space there is small and I mainly use it for either extra items or person-specific items that get used often but not on a daily basis. The main cabinet is about 90 inches tall by 25 inches wide and 12 inches deep. I use it primarily to store our medicines, toiletries, first aid supplies, and things that get used on a regular basis or what I think should be stored there.
Now, as I mention earlier, I love to organize and my favorite part is to open a cabinet and have it neat and in order. I like to be able to easily pull things out and not have to move a bunch of stuff out of the way. For, example when it comes to pill bottles I hate digging and knocking a bunch over only to figure out it’s not the one I was looking for. And believe me, after the last month of my whole family being sick, I had had enough of digging for medicines and not being able to find what I was looking for. So going into this project my goal was to organize the cabinet so that I could easily get to the items we need without having to dig through a bunch of stuff.
Taming the Chaos: My Process in Organizing the Bathroom Cabinet
Below I’ll list the steps that I usually take when organizing any cabinets. There are a few things I would like to note. The process of organizing something really depends on the size of that project. Some can take a few hours while others take a lot longer. So be mindful of that. I always see videos and clips of people snapping their fingers and it’s done or recording the process and it seems to go fast. But, honestly, this project took me about two days to complete because I have a family, have to make lunch and there is always a mess that needs to be cleaned up. So, ignore the social media on this and just do it until you complete the project.
The steps below are a guide and there are some things that could be done in an alternate order so do what works for you. But here is how I organized this project.
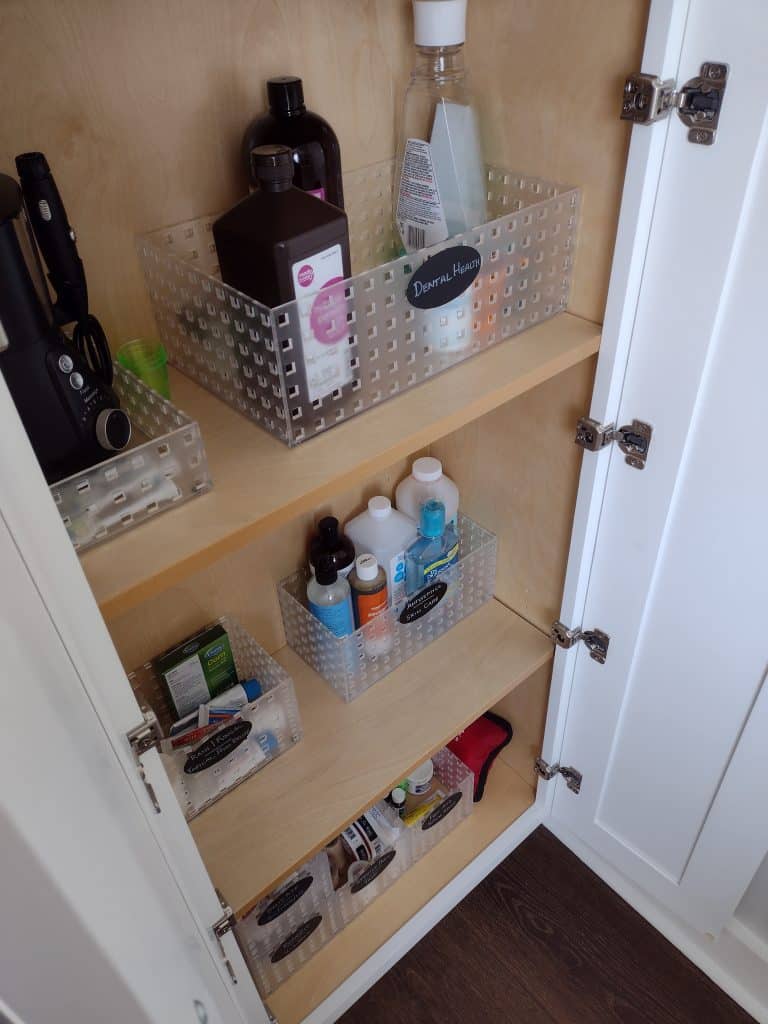
- Before starting the project, I opened up my cabinet took measurements, and made an initial drawing of how I thought I wanted to organize the cabinet. Remember this is an initial drawing because you will end up changing something, potentially moving items, and cleaning items out. When I do this step I like to either group like things together or organize them by how they are used. For example, I have a section for antiseptic liquids but I keep the hydrogen peroxide with dental stuff as we tend to use it more as a diluted mouthwash or mixed with baking soda.
- After the initial drawing, you can do one of two things: order your containers now or clean out the cabinet first. For this project, I chose to clean out the cabinet by taking everything out and taking inventory first, before ordering containers. I have ordered containers first for other projects but I usually choose to do that if I know that I’ll use those containers for other purposes. When I order specific containers for a project then I like to order as close to the amount that I need as possible.
At this point, I took everything out, cleaned out things that were expired, and placed items according to my initial plan. I also removed items I didn’t want to have in that cabinet and threw out the one-off items that don’t get used. I also wrote out sticky notes to help me keep the groups together. I had all of this on my bathroom floor. I like doing this as it gives you an eagle eye on everything you have.
Note: this was all I could accomplish that day so I ended up putting the stuff back into the cabinet and moving on to step 3.
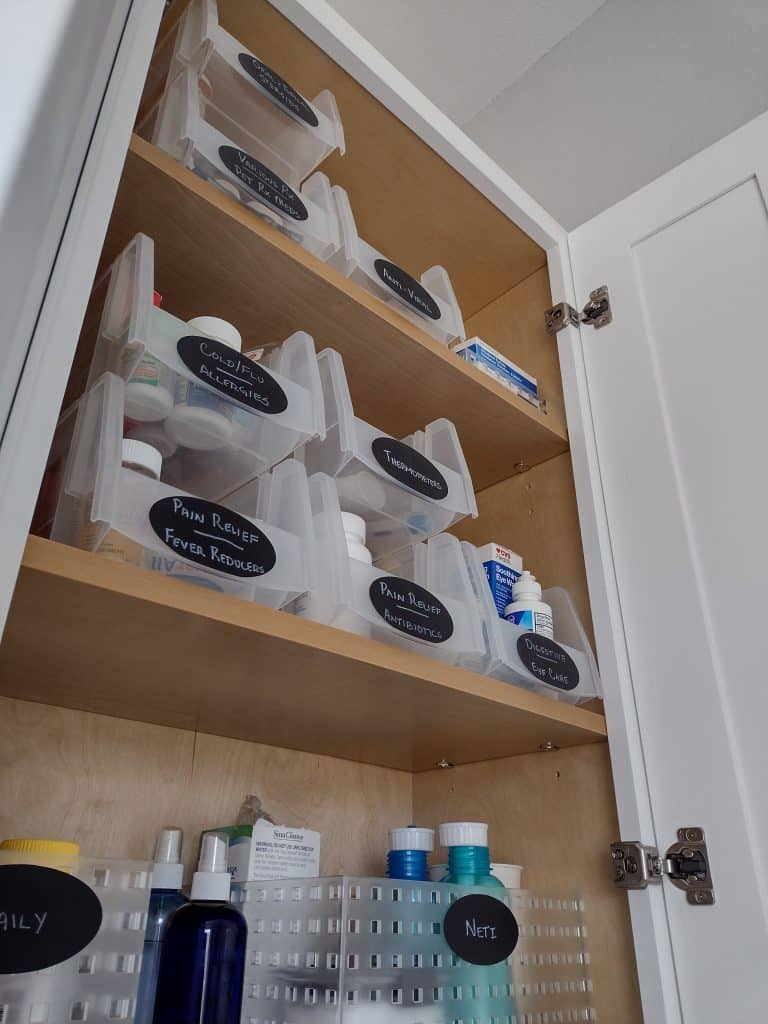
- Order containers. As I mentioned earlier, I measured the cabinet and had an idea of what size containers I wanted. For this project, I wanted something that had an open front and containers that were stackable but had a high enough opening that common medicine containers would fit. Honestly, it was actually kind of hard to find containers that fit this criteria, especially if you add cost. In addition, I had containers in there previously that I planned on continuing to use but didn’t have enough for all of the categories.
Note: These are the containers I ordered and these are the containers I already had.
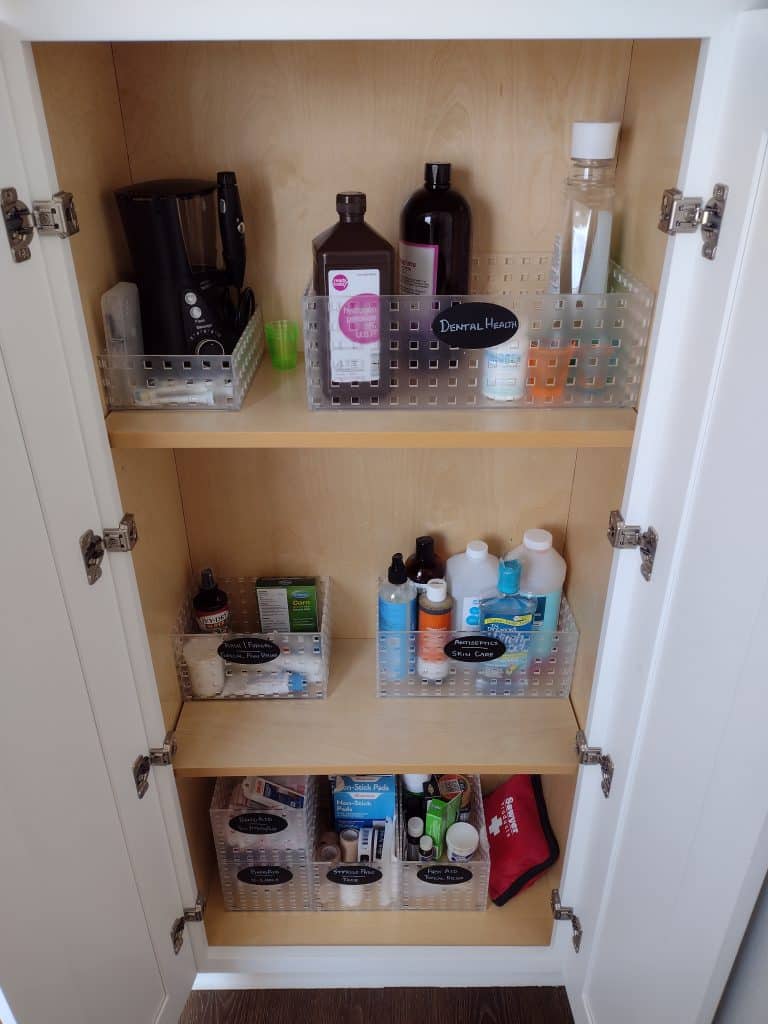
- Once you have your containers you are ready to go. I like to work with an empty cabinet so I take out all of the items and start placing them in their prospective containers. I also like to take this time and wipe down the new containers as well as the shelves and the cabinet as a whole. Then start placing the containers on the shelf according to your initial plan and change them as needed. I mostly stayed with my plan but did end up combining digestive and eye care because I didn’t have much in either category so I just placed them together because I wanted them on that particular shelf.
- Once, you have the items in the containers you can start the labeling process. I like to list what’s in each container by its category and if it has two items I usually divide it by a horizontal line.
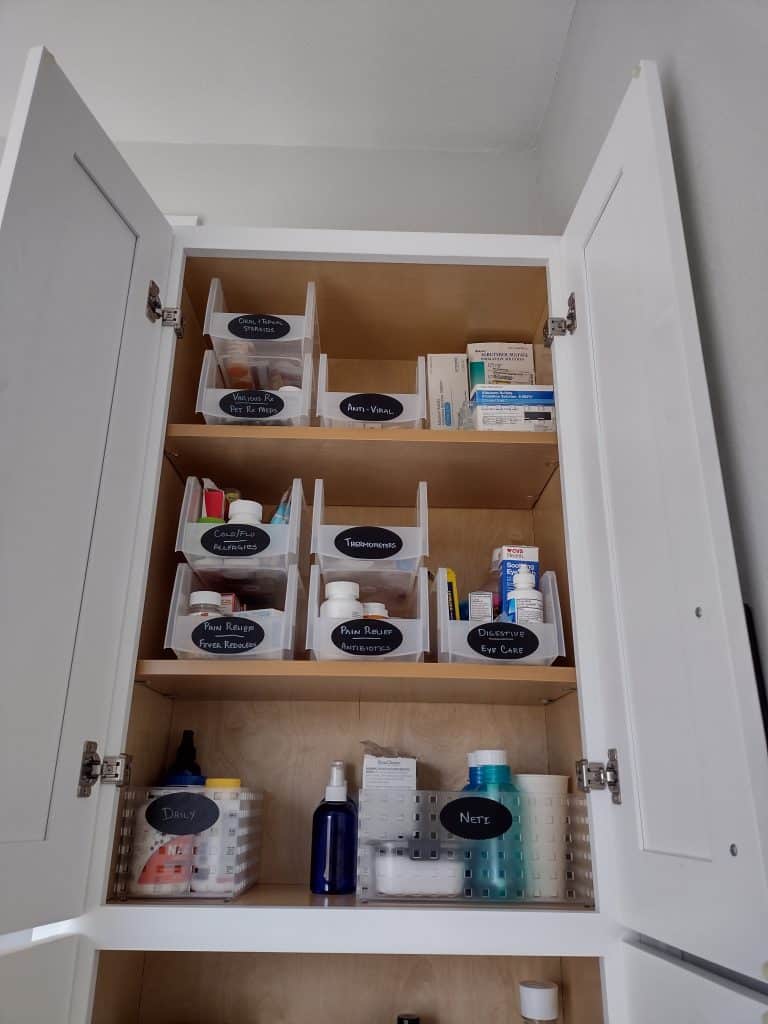
Sample List of Categories for a Medicine Cabinet
Below you’ll find a sample list that I started with but I made adjustments after I figured out what I had and how much of that category I had.
| Category | Included Items |
| Pain Relief | Acetaminophen Ibuprofen Aspirin Topical analgesics (creams, patches) |
| Cold and Flu | Cough suppressants Expectorants Decongestants Throat lozenges Cold and flu relief meds |
| Allergies | Antihistamines Nasal sprays |
| Digestive Health | Antacids Anti-diarrheal meds Laxatives, stool softeners Gas relief meds |
| First Aid | Bandages, adhesive tape, gauze Antiseptic solution, wipes Topical antibiotic ointments Hydrocortisone cream Tweezers, scissors |
| Skin Care | Moisturizers Sunscreen Hydrocortisone cream Acne treatment products Lip balm, lip care products |
| Oral Care | Toothbrushes, toothpaste, floss Mouthwash, oral rinses Oral analgesics |
| Prescription Meds | Organize separately and label according to what you have |
That’s It, Your Roadmap to an Organized Cabinet
Well, there you have it. This is the process I went by when I organized the medicine cabinet in our bathroom. Overall, I am pretty happy with the results. Ideally, the cabinets would fit like ½ an inch away from the edge but am just being picky. Hope you found this helpful and inspiring to organize a cabinet you have been wanting to do.